Installation guide

ThermoSave installed
In the box
Controller ×1
Green wire (10 AWG) ×1
Temp. sensor ×1
Cable ties ×2
Installation guide ×1
Tools needed
· Phillips screwdriver
· Flathead screwdriver
· Needle-nose pliers
· Voltage tester
⚠ Safety: Turn off the water heater circuit breaker (max 30A) before any wiring. Verify power is off with a voltage tester before touching any wires.
Requirements
Electric resistance water heater
Max 30A circuit breaker
2.4 GHz WiFi in range of water heater
iOS or Android smartphone
1
Turn off breaker. Remove the electrical cover plate from the top of the water heater and disconnect the wires. Connect the included green wire to the ground screw on the water heater.
Step 1.1 — panel open Step 1.2 — neutral wire
2
Open ThermoSave by removing the 4 screws on the front cover. Then attach the water heater's cover plate (where AC mains was connected) to the bottom of ThermoSave using the original nut. Step 2 — attach cover plate
3
Lower ThermoSave onto the water heater, threading all three wires through the bottom hole. Attach the cover plates to the water heater again with original screws. Step 3 — unit seated
4
Ensure bottom three BOILER terminals are sufficiently open, or screw counter-clockwise, then insert the three wires from the water heater into the terminals. Screw clockwise to secure, afterwards gently pull each wire to confirm secured.
Green (included) wire → Earth. The other two (ACN, ACL) are interchangeable.
5
Feed the power line through the conduit fitting on top. Secure with the original conduit nut. Bend and trim wires as needed, ensuring ¼" (6 mm) bare wire for terminal connection. Step 5 — conduit nut
6
Ensure top three IN terminals are sufficiently open, or screw counter-clockwise, then insert the three wires from the power line into the terminals. Screw clockwise to secure, afterwards gently pull each wire to confirm secured.
Green or bare wire → Earth. The other two (ACN, ACL) are interchangeable.
Step 6 — IN terminals wired
7
Close the ThermoSave front cover with the 4 screws.
8
Attach the temperature sensor to the hot water outlet pipe (usually on your left, touch to confirm it is warm) using both cable ties, as close to the water heater as possible. Insert the connector on the other end to the right side of ThermoSave. Step 8 — thermistor on pipe
9
Restore power at the breaker. The LED should blink once per second. If not, press and hold the button on the right side of ThermoSave for 3 seconds, then release.

App setup
Open the ThermoSave app → Sign in → tap Add your device and follow the in-app instructions. Setup takes about 5 minutes. Download the app →
QR code — download app
Download app

LED & button reference
· · · ·
blink
Setup mode — ready to connect to appHold button 3 sec to re-enter setup mode
∿ ∿ ∿
pulse
Auto — saving per your schedule5-second cycle

on
Heat now — heater always on

off
Vacation — heater always off
Press button briefly to cycle through modes. Modes can also be changed in the app.


Troubleshooting

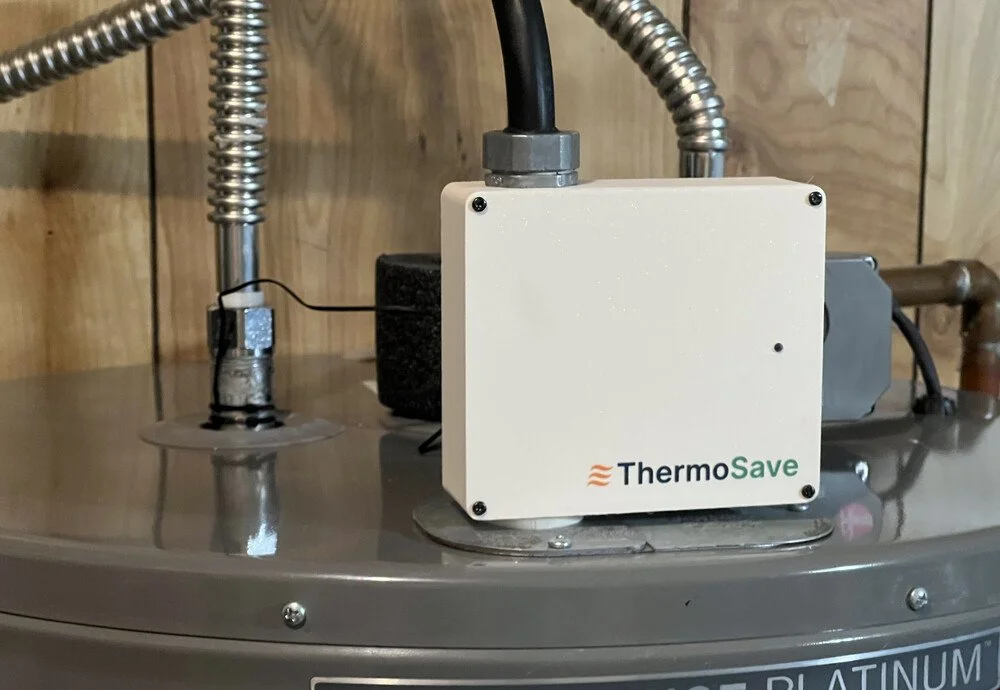
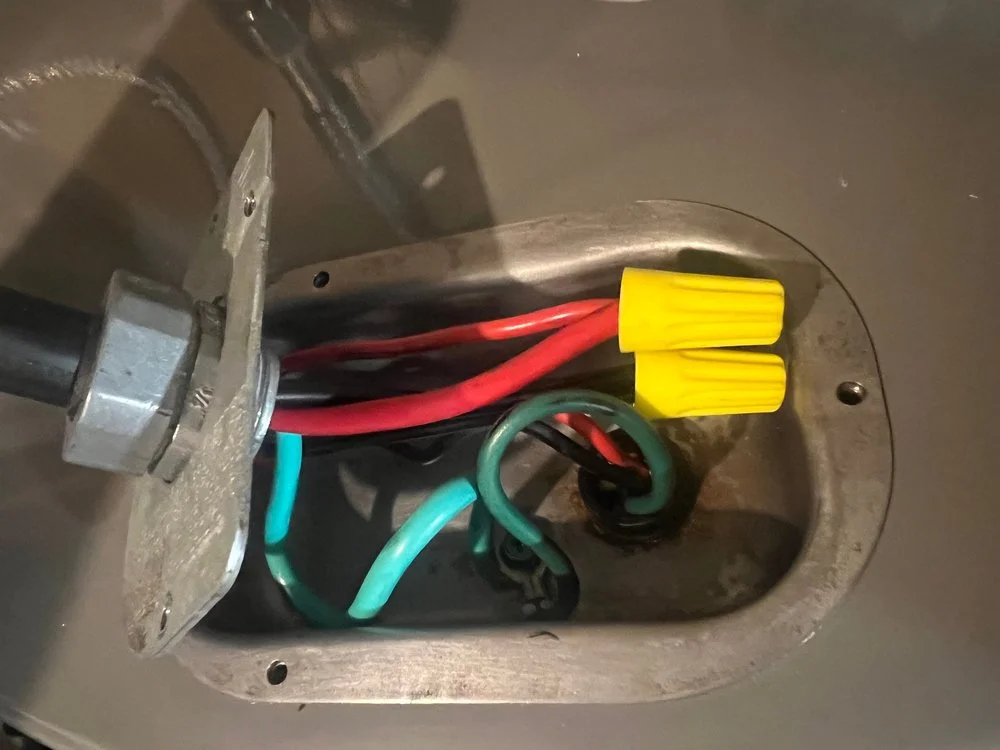
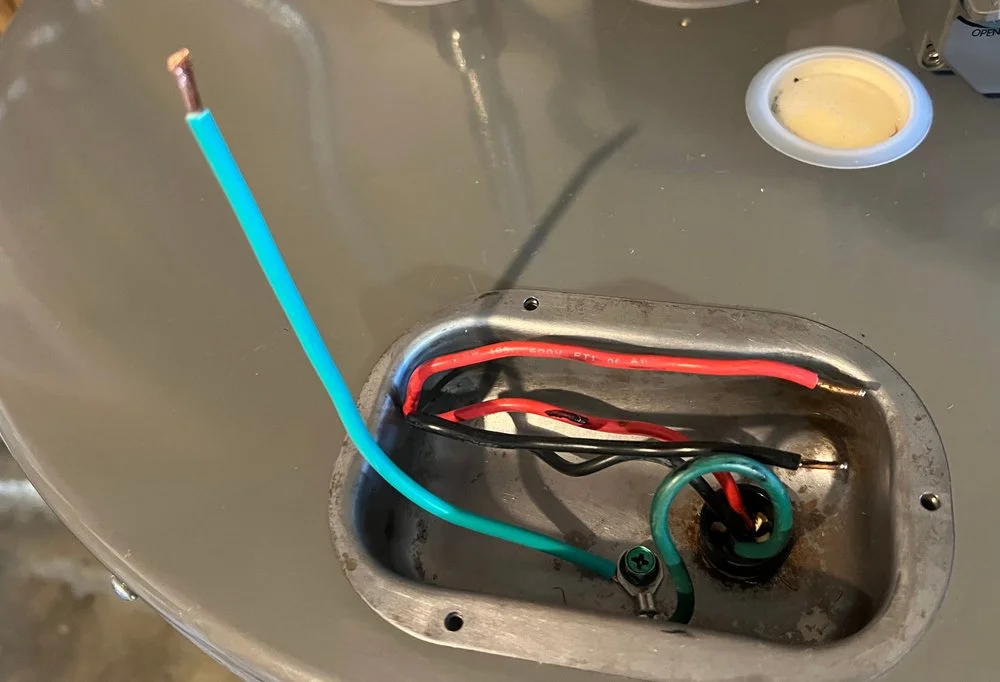
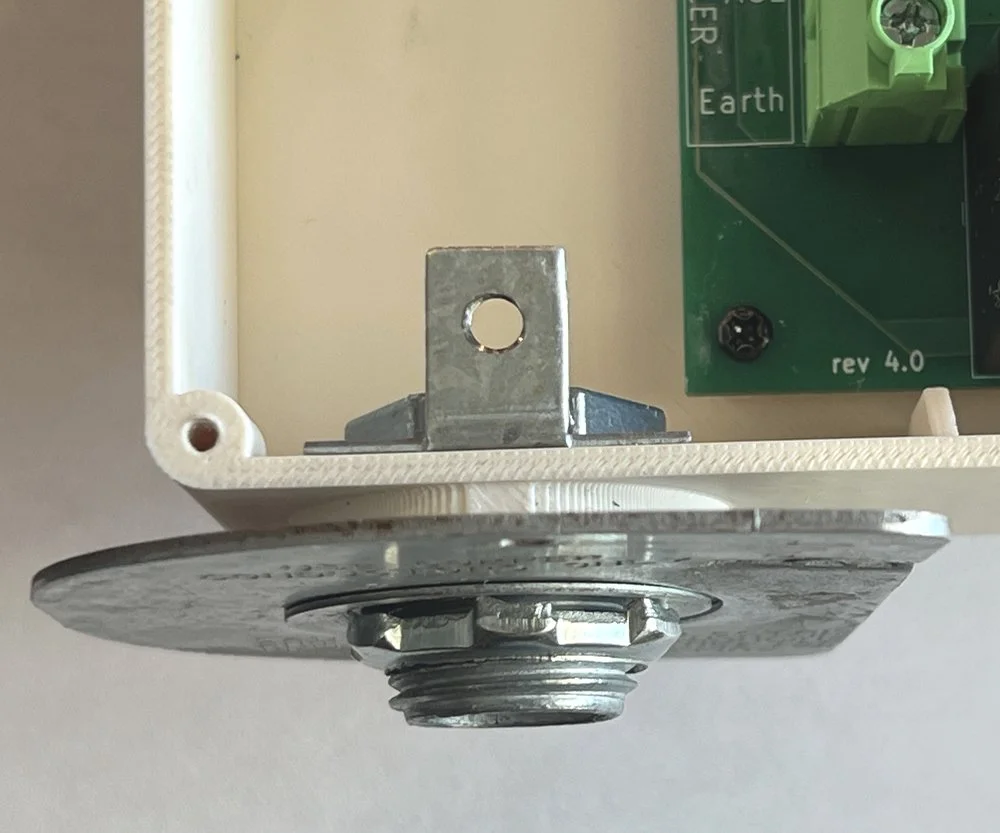
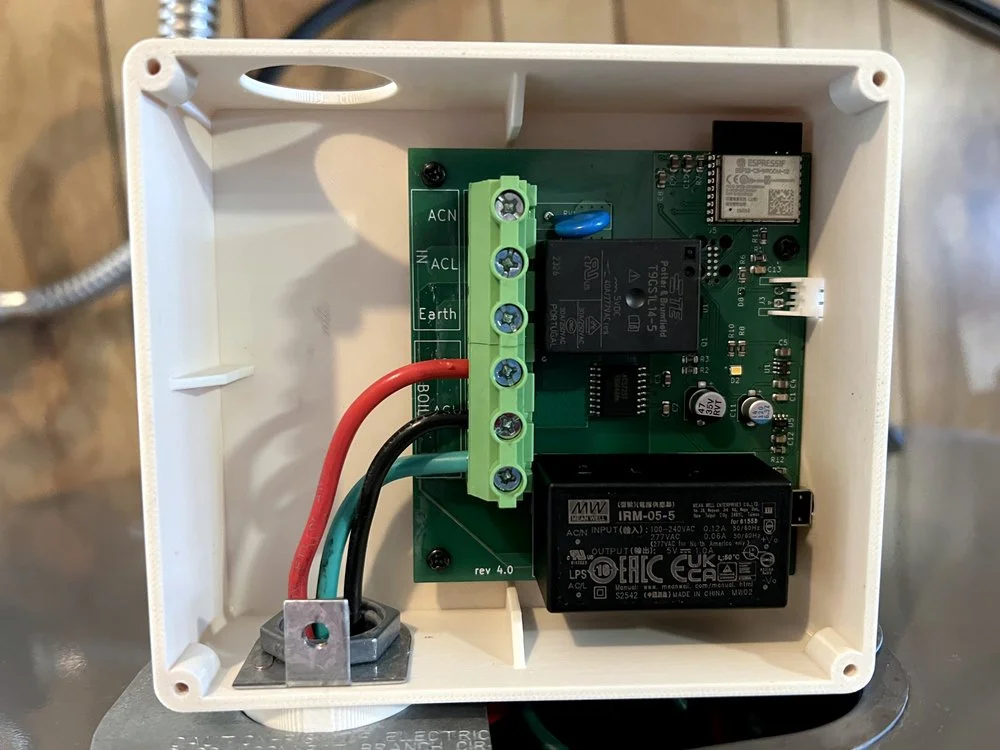
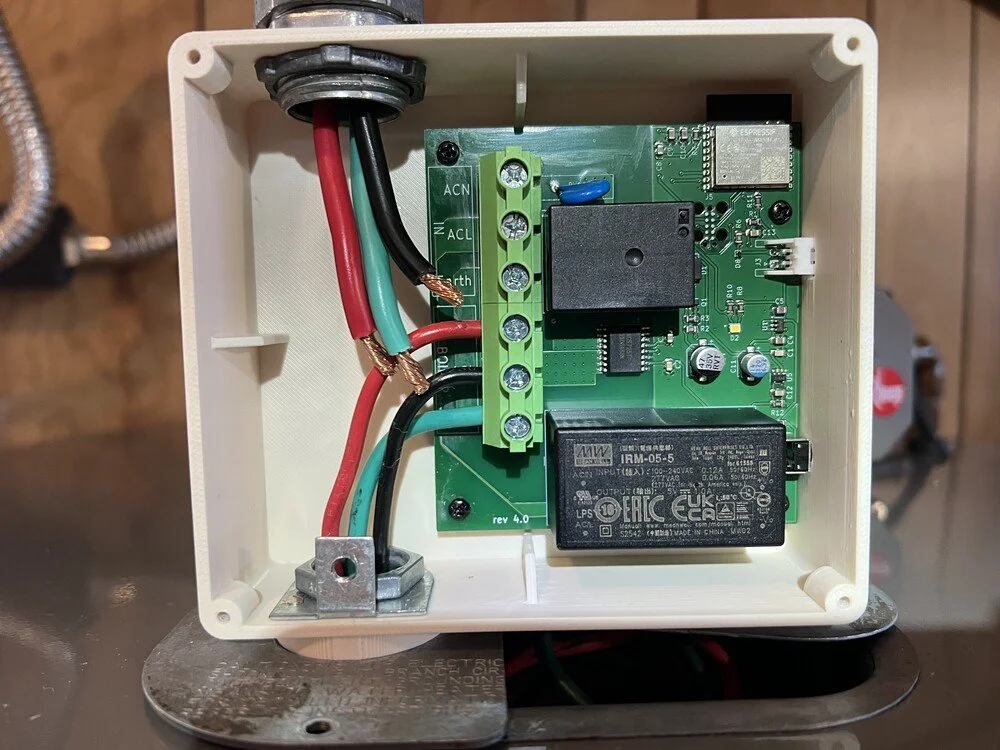
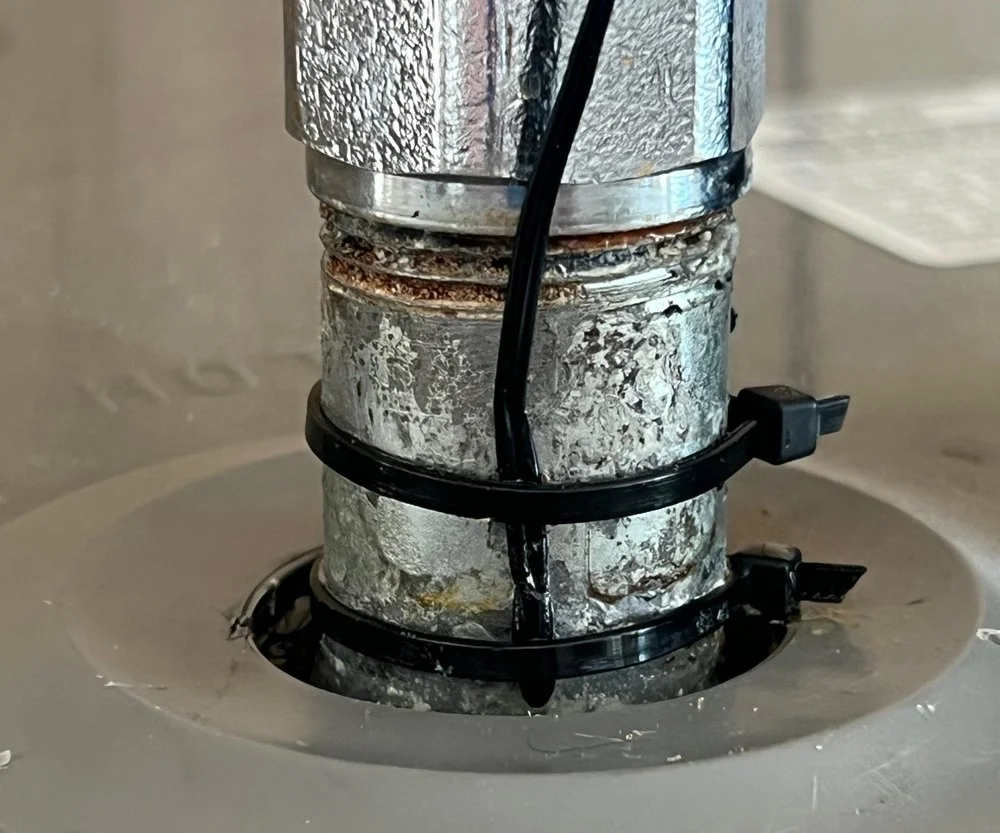
  • Water heaters use different hardware to connect the power line, and ThermoSave is designed to reuse whatever is already on your unit. You need two secure connections: at the bottom, ThermoSave attaches to the water heater's existing knockout using the original conduit connector and locknut. At the top, the incoming power line is secured to ThermoSave through the conduit fitting with a locknut — this can be the original hardware from the water heater's junction box, or a standard ½" conduit connector if yours is missing.

    The key check: ThermoSave should be firmly attached to the water heater, and the power line should not pull free from the top fitting.

  • Press and hold the button on the right side of ThermoSave for 3 seconds, then release. The LED should begin blinking once per second. If it still doesn't light up, verify the breaker is on.

Still need help? Email us — we typically reply within one business day.